- For other uses, see Hunted.
- "Shot down in Western Russia while returning with Nikolai, evade Ultranationalist patrols on the way to extraction."
- — Call of Duty: Modern Warfare Remastered level description
Hunted is the seventh level in Call of Duty 4: Modern Warfare, and the level itself is featured in the Call of Duty: Modern Warfare 2 Special Ops mission Overwatch. It goes through Captain Price's squad getting shot down in Western Russia and having to make their way through fields until an AC-130 gunship arrives.
Characters
- John "Soap" MacTavish (playable)
- John Price
- Gaz
- Nikolai (W.I.A.)
- Farmer (Alive/Deceased) (player-determined)
- Paulsen (K.I.A.)
- Hammer Two-Six (destroyed)
Plot
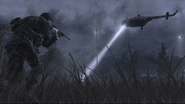
Hunted continues where the mission "Blackout" left off. On the way to Germany's safehouse to deposit Nikolai, the occupants of the helicopter spot a bright light coming into the sky. A Stinger missile is heard and the helicopter is hit and shot down. SAS trooper Paulsen and the pilots die in the crash, leaving Captain Price, his team, and Nikolai forced to make their way to safety through fields and shacks in order to avoid the notice of a helicopter sent to search for survivors. The helicopter eventually notices them and they have to use cover to advance and avoid fire from the helicopter. After storming a barn, Soap successfully destroys the helicopter using a Stinger missile he found in the barn. After heading out of the barn, the squad is met by a huge convoy of enemies that is decimated by heavy fire from an AC-130 gunship. The player then continues the operation as the Spectre's TV operator in the mission "Death From Above".
Walkthrough
Getting started
The player will spawn in a helicopter, presumably an hour or so after "Blackout". An enemy missile will lock-on and damage the chopper.
After being knocked unconscious very briefly, the player will wake up with the chopper to the right ablaze. The starting weapon is an M1911, it would be best to pick up either the G36C, MP5, or the M4A1 from Paulsen's or the pilots' corpses. The G36C has slightly extra power and is plentiful among dead Ultranationalists. Selecting both weapons and leaving the pistol behind for even more ammo would also be wise (the G36C and M4A1 share ammo).
Baseplate will inform the squad that an AC-130 gunship is en route to their location, but it will take some time to arrive. Another squad-mate will join the party up the road. He will tell Cpt. Price that some vehicles are coming from the North, run underneath the bridge before the helicopter arrives overhead. Veer left and move up to the next building. Price will open the door, allowing all to head towards the windows. A farmer is about to be executed by some Ultranationalists. Pick off the one talking first. The one interrogating the farmer is carrying an M1014. The player can pick this up as it might come in handy later in the level. Gun down the rest of the hostiles in the area, but don't move up yet. The rest of this level will switch from close-quarters to long range combat quite often. While both the M4A1 and G36C are heavy hitters, they are designed for long range combat. The G36C has a low rounds per minute and more visual recoil, the M4A1 does less damage. For this, the player should grab the MP5 from one of the dead enemies. Switch back to the long range weapon, jump over the fence and head towards the field.
The First field
The chopper is prompt to return. Price commands everyone to hit the ground and stay still. Pick a spot with shrubbery or a clump of grass and prone quickly. The player can stand up as soon as the Captain gives the signal, then run to the other end of the field. Hostiles will head in from the South, and the helicopter will return and drop off troops from the east. Shoot down the tangos rappelling down the ropes to make the job a little easier while throwing flashbang grenades towards the hostiles advancing from the south while taking down the gunner in the chopper's opening.
After a while, Gaz will open the door to the basement of a house. Head in and take a deep breath.
Advancing forward
Once inside the house, the player will come across some windows along the way overlooking the hostiles that overran the previous position. In the next room, a door to the outside will be open. A tango will run in, eliminate him quickly. Two more will come in after him, and one of them will throw a flash. If the player executes these threats quickly enough, getting shot while blinded will not be a problem. If the player wasn't able to kill them in time, hit the floor by going prone and fire. Once they're dead, head into the next area.
It will get quiet all of a sudden, as one of the squad-mates will point out. Move up and go past the barrels. In this situation, hostiles will be firing upon the player and two dogs will be attacking the player at the same time. Instead, trip the trigger around the barrels that sets off the dog barking and move back towards the squad. They should take care of the dogs, allowing the player to get some cover. The best cover in this case would be the wooden warehouse to the right, which the player can enter from the east. From there, gun down some tangos from the windows until it's safe to move up. The player can swap back to the long range weapon if so desired. The MP5 can mop up the rest just as well. When given the chance, follow the fence on the left to the end. A good vantage point to gun down any tangos on the western side of the brick building is attainable. Once they're down, move up towards the metal stairs. Head up these stairs to a balcony. The player will be able to get a good overview of the firefight without much fire. Take out the remaining hostiles and follow the squad. Additionally, it is possible to avoid entirely the trigger that spawns the second set of dogs by staying out of the main firefight and advancing across by jumping over the right-hand side of the balcony.
The second field and greenhouses
Next, the player will be lead to another bridge where that chopper will fly overhead again. Wait for it to fly off and move up. Like the last time while moving through a field, the squad will be compromised at a random moment before they reach the field's end. Here, stealth skills are required again, or just open fire on the stationary watchmen. The hay bales make excellent cover if under serious fire. Once all tangos are down, head to the greenhouse to the northwest. Gun down the hostiles in the small courtyard, using the small shack to the right as a flank. Use a flash if necessary. Move up to the next greenhouse. Swap back to the MP5 now that the fighting is close up. More Ultranationalists will be in their way, shoot them through the small openings in the glass. Once all tangos are down, move up.
Fight to the finish
The helicopter will return once again, and at a very inconvenient time. Multiple tangos will stake out in front of the barn house to try and pin down and prevent any escape. Head left through the remains of a building and prone in the corner with a pile of rubble near the doorway. Take out any hostiles if at all possible, then throw a flash over the wall. Advance forward and take cover behind the sandbags. Kill any stunned hostiles, prone under the sandbags to regain some health, and finish off the rest. Keep some attention to the chopper while shooting the rest of the tangos, as the gunner in the helicopter's opening will return and open fire. Gun him down with a long rang weapon and head in to the barn when possible, but beware, sometimes he will respawn after some seconds. The gunners RPD is a good weapon for both close and long range, even with its iron sight. Kill any remaining hostiles in the warehouse and wait for the rest of the squad to catch up. Cpt. Price will order the player to pick up the FIM-92 Stinger in order to take down the pursuing chopper. Like with the Javelin in the previous level, use the iron-sights and keep the center of the circle on the chopper. When a long beep sounds, fire away. Unfortunately, the chopper is dropping flares, preventing missiles from hitting it. Grab another Stinger from the barn and try again. This time, success and the helicopter goes down.
Head back to the barn and follow Price out of the building. Go to the end of the road until a tank rolls in. None of the tangos here will notice any enemy positions, but it's best to stay back and watch the show. The AC-130 has arrived and will open fire on the hostiles ahead. Sit back and watch the fireworks. After everything has been set ablaze, move up to exit the level.
Videos
Weapon Loadout
| Starting loadout |
|---|
| Initial area |
|---|
| Found in level |
|---|
|
M4A1. Used by Capt. Price G36C. Used by Gaz and Ultranationalists MP5. Used by SAS and Ultranationalists AK-47. Used by Ultranationalists AK-74u. Used by Nikolai G3. Used by Ultranationalists Mini-Uzi. Used by Ultranationalists RPD. Used by Ultranationalists M1014. Used by Ultranationalists M9. Dropped by enemies in Last Stand Stinger. Used to shoot down helicopter |
Enemy Intelligence
- Laptop 10 is located in a house after Russian troops flashbang and ambush the house the player is in. It is located in a house with a broken car and a soda machine in front. Enter the house and the laptop is on the right. If attack dogs approach, the player has gone too far.
- Laptop 11 is found once the player leaves the second greenhouse, follow the building on the left to an area covered by a sheet metal roof. The laptop is in that area.
Achievements
- Man of the People (10
 ) - obtained when saving the farmer surrounded by Ultranationalists near the beginning of the mission. However, the player must wait for Captain Price to give the order to fire, or the achievement may not unlock.
 - Down Boy Down (20
 ) - obtained if the player survives a dog attack (when the player breaks its neck).
 - The Escape (40
 ) - Complete "Hunted" and "Death from Above" on Veteran.
Gallery
Transcript
- Main article: Hunted/Transcript
Trivia
- There is a mistake in the pilots' Mayday call after the Stinger missile hits - the helicopter is referred to as "Hammer 6-4".
- If the farmer is saved, he will run into the house and through a door without opening it. He then staggers through the door and despawns.
- The player cannot sneak past the searchers in the hay field without using console commands, near the other side of the field an Ultranationalist soldier will automatically spot the player no matter how careful the player is.
- The helicopter can be shot down in the first field with eight shots from the M203 grenade launcher, obtained through the "give all" command. It will whirl around and crash outside the map to the south.
- When the player reaches the second field, the helicopter reappears. It can be shot down with just one shot from the M203 grenade launcher (obtained through the "give all" command).
- The helicopter cannot be shot down with a Stinger missile until all the enemies in the second field have been eliminated.
- When the team approaches a fence gate after the enemy helicopter passes, Captain Price says "It doesn't look like they know where we are" but in the subtitles it says "It looks like they don't know where we are."
| ||||||||||||||||||||


