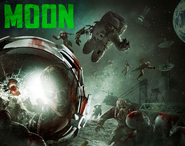
- "I believe that this nation should commit itself to achieving the goal, before this decade is out, of landing a man on the moon and returning him safely to the Earth. (JFK, 1961)"
- — Moon level description
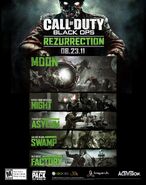
Moon is the eleventh and final Zombies map included in Call of Duty: Black Ops in the Rezurrection map pack. It was released on August 23 for Xbox 360 and September 22 on PS3 and PC. The recurring original characters return (Dempsey, Nikolai, Takeo and Richtofen). Moon is the largest Zombies map in Call of Duty: Black Ops, and the third largest zombies map in terms of playable area after Green Run and Origins.
Overview
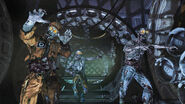
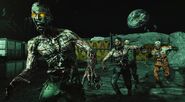
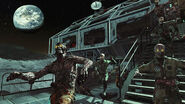
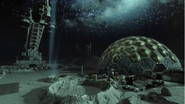
Occurring in Area 51 and on the Moon itself, this map is a challenge for all players. Tank Dempsey, Nikolai Belinski, Takeo Masaki, and Edward Richtofen return as playable characters, as well as being able to play as Samantha Maxis as part of the main easter egg. Two new Wonder Weapons make their debut: the Wave Gun and the Quantum Entanglement Device, with the Gersch Device replacing the Monkey Bomb from other maps. Two new pieces of equipment also make their debut: the P.E.S. and the Hacker device. The P.E.S. grants the player the ability to survive in locations which contain no oxygen, while the Hacker device allows the player to hack various objects throughout the map to produce a wide assortment of effects. Two new Zombies are featured in this map: the Astronaut Zombie and the Phasing Crawlers; the Astronaut Zombie will walk around slowly, and if it can grab the player, it teleports the player randomly to another place if they have opened the door leading towards that specific area and, only if the player bought a perk, the astronaut zombie will also steal a perk, while the Phasing Zombies are an advanced version of the Crawler Zombies, which can teleport short distances towards the player. Phasing Crawlers have less health than Nova Crawlers, whereas the Astronaut Zombie has massive health, similar to the Napalm Zombie from Shangri-La.
Spawning in Area 51, zombies will spawn with low health and speed, as if it were round one, and gradually over time become stronger and faster as time increases. Two sounds will be heard, a soft beeping which signals the access to the teleporter to go to the moon and then an alarm similar to that of the Tactical Nuke sounds to alert the player(s) each time the zombies gain more health. Hellhounds will spawn randomly with the zombies, with a maximum amount of 10 able to spawn at once. Juggernog or Speed Cola will randomly spawn, alternating each time the player travels to Area 51, and at the beginning of each game. If players are overwhelmed, they can fall back to the teleporter where they will be sent to the Receiving Area at Griffin Station, on the moon. To fully activate the teleporter, the player(s) in the game must stand on it. When first arriving, artificial oxygen will not be available, making a P.E.S. compulsory to survive, a P.E.S. station will be directly in front of the player when they are teleported. Unlike the previous maps, there will not be any weapons in the "spawn room", needing to open another door to gain access to the M14 and the Olympia, along with two more spawn areas, with the "spawn room" only having two barricaded windows. Once the power has been restored, artificial gravity will be restored inside the buildings. However, oxygen can be removed by either Excavators, or if they player breaks a window with explosives in the laboratories or spawn room. Any locations that have no oxygen also have low gravity.
Note that Area 51 does not feature rounds, instead it will last until the players die or use the teleporter, with the zombies getting stronger and faster as time goes by.
New Features
- A new Perk-a-Cola: Mule Kick. When bought, the player will receive a third gun slot. When the perk is lost, the gun that the player buys within that slot will disappear.
- Two new Wonder Weapons: the Wave Gun and the Quantum Entanglement Device (QED).
- New types of Zombies: Phasing Crawlers and Astronaut Zombies.
- The return of Hellhounds. The Hellhounds only spawn in Area 51 after the player(s) stays there long enough.
- Low gravity environment
- Areas with no oxygen
- Gravity Lifts
- The P.E.S. and the Hacker. A player can only have one of these at a time as both are equipment.
- A Teleporter which takes the player(s) to Area 51. There is another teleporter in Area 51 which takes the player(s) to the Receiving Area. Both of these teleporters will only activate when all the player(s) currently alive in the game are standing on it.
- A new easter egg called Richtofen's Grand Scheme.
- The characters' player indicators are now randomized. (Except Dempsey, Only Nikolai, Takeo and Richtofen are randomized.)
- Five playable characters; as Samantha Maxis is now playable in the body of Richtofen after completing Richtofen's Grand Scheme.
- The Excavators, which will at some point activate, and unless stopped, will breach either Tunnel 6, 11 or the Bio-Dome, resulting in decompression (oxygen loss).
Weapons
| Starting Weapons |
|---|
| Off-Wall Weapons |
|---|
|
M14 - 500 points; Outside the Receiving Area, near the door to Tunnel 11. Olympia - 500 points; Outside the Receiving Area, near the door to Tunnel 6. PM63 - 1000 points; Through the first door in Tunnel 11. MPL - 1000 points; Through the first door in Tunnel 6. MP5k - 1000 points; In the top floor of the labs near the entrance to the Biodome. M16 - 1200 points; In Tunnel 6 next to the door leading to the Power Room. Stakeout - 1500 points; Inside the Power Room. Bowie Knife - 3000 points; On a wall above the stairs linking the middle and top laboratory. The player must jump down the stairs to get it. Claymore - 1000 points; On a crate in the Biodome. |
| Mystery Box |
|---|
Perks
| Perk-a-Cola Machines |
|---|
|
Juggernog - 2500 points Quick Revive - 1500 points (500 points on Solo) Speed Cola - 3000 points Double Tap Root Beer - 2000 points PhD Flopper - 2000 points Stamin-Up - 2000 points Deadshot Daiquiri - 1500 points (1000 points on PC version) Mule Kick - 4000 points |
New Perk
- Main article: Mule Kick
Mule Kick is the new perk on this map, located near the Teleporter and the AK-74u. It costs 4000 points and lets the player carry three weapons. The player will then have to purchase the third weapon off the wall or from the Mystery Box.
Locations and oxygen levels
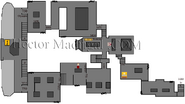
Oxygen is not present in any areas until the power switch is turned on. Once this is done, oxygen still is not constant throughout the Griffin Station, and can be removed by various factors in the game. If the oxygen is removed, the announcer can be heard saying "Warning: Major decompression on (location). P.E.S. required.".
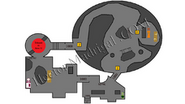
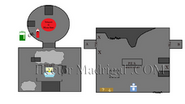
- Area 51: The default spawn; Area 51. There is nothing to purchase here, with the exception of either Juggernog or Speed Cola (alternates each time when the player enters) and Pack-A-Punch. A teleporter is located here for access to the moon. It is easy to hoard zombies here because of the open space, allowing people to have early Juggernog, Speed Cola, or a Pack-a-Punched weapon since the power is always on here.
- Receiving Bay: This is where the player teleports to after leaving Area 51. It contains the P.E.S., two doors, which cost 750 points (buying one of the doors opens the other too), two windows, Quick Revive and, next to this one, a Mystery Box spawn. It also has three panels that, when used with the Hacker, deactivate the excavators. If Excavators Pi and Omicron are activated (Tunnel 6 and 11), and one player gets downed here while the other are on the other side, he/she can get the One Giant Leap achievement/trophy upon respawn.
- Outside Receiving Bay: The next accessible area after leaving the Receiving Bay. There is a launch pad to take the player back in, and consoles for playing "Samantha Says," necessary for Richtofen's Grand Scheme. There are two tunnels accessible from here. There is also a huge trench where the three rockets that blow up earth in Richtofen's Grand Scheme. If you jump into this via one of the two openings, you will be downed and killed instantly. There is no oxygen here.
- Tunnel 6: A purple-walled area with a confusing pathway from one end to the other. It is a cheaper and faster route than Tunnel 11 to activate the power and find an MPL and M16. Zombies are able to spawn in the ceiling here. There is oxygen here, but an excavator (Pi) can remove it. This tunnel must be breached during Richtofen's Grand Scheme.
- Tunnel 11: A more expensive route than Tunnel 6, but contains Stamin-Up and Semtex grenades, along with a PM63. There is oxygen here, but an excavator (Omicron) can remove it.
- Power Room: The room unlocked after exiting either tunnel. The pyramid in which Samantha will spawn during the Easter Egg is located here. Right below the pyramid, there is the power switch. A Mystery Box spawn is in this room. There is no oxygen here. Players can purchase a Stakeout here.
- Laboratories: Three floors accessed from the Power Room. The first two are unlocked using a single door, the third must be unlocked for another 1000 points. The Hacker may spawn on a desk located in any of these stories. There is oxygen here, but it can escape if an explosive shatters glass. Double Tap Root Beer is located on the first floor and Deadshot Daiquiri is located on the third floor.
- Outside: Accessed from third floor of laboratory. The teleporter back to Area 51 is here. Inside the teleporter is a small gap that leads back down into the Power Room, useful as a shortcut or escape, and also a door to the Bio-Dome. There is no oxygen here. A Mystery Box spawn is here. Mule Kick is located here. To the right of Mule Kick on the wall, there is a AK-74u available for purchase for 1200 points.
- Bio-Dome: Accessed from the third floor of the labs, or the Outside area. Gravity Lifts are in this room, which can transport the player from side to side. Power-Ups spawn between the Gravity Lifts, which players can acquire if they jump on the pad. A Mystery Box spawn is here, as is oxygen, but it can be removed by an excavator (Epsilon). PhD Flopper is close by the Box spawn, across from the entrance to the labs. Also, Claymores can be bought here. There is another door at the far end which leads to the teleporter area.
Easter Eggs
- A musical easter egg called Coming Home, activated much like the previous songs, finding and hitting the action button on three Teddy Bears with P.E.S Helmets on scattered around the map.
- The first one is in the outside of the Receiving Bay, on a pile of crates right below the building (just next to the Launch Pad).
- The second can be found above the P.E.S. suit in the air lock between Tunnel 6 and the power switch area.
- The third one can be found close to the Stamin-Up/Semtex in Tunnel 11 in a hole in the wall (the helmet will stick out).
- The second musical easter egg, is a remake of Damned, called Re-Damned. It is activated by holding the action button by a computer in the lab next to the door to the Bio-Dome. It can be only heard in close proximity to the terminal.
- The third musical easter egg is Nightmare by Avenged Sevenfold. It is activated by getting the One Giant Leap achievement.
- The fourth musical easter egg is an 8-bit version of Coming Home. It is not required that Re-Damned be previously activated . It can be activated by pressing X (or square) on computer equipment at the end of Tunnel 11 next to a radio near the power room door. It can be only heard in close proximity to the terminal.
- The fifth musical easter egg is an 8-bit version of Pareidolia, it is activated by pressing the "use" button near a computer in the labs, in a corner to the left when entering it from the power room, and can only be heard in close proximity to the terminal.
- A major easter egg, Richtofen's Grand Scheme.
Achievements/Trophies
One Small Hack for a Man... (5 ![]() / Bronze Trophy
/ Bronze Trophy ![]() ) - Hack something.
) - Hack something.
One Giant Leap (5 ![]() / Bronze Trophy
/ Bronze Trophy ![]() ) - Trap your self in the Receiving Area and free yourself through resurrection in co-op.
) - Trap your self in the Receiving Area and free yourself through resurrection in co-op.
Ground Control (10 ![]() / Bronze Trophy
/ Bronze Trophy ![]() ) - Stop each excavator from breaching the base in one game.
) - Stop each excavator from breaching the base in one game.
Fully Armed and Operational (25 ![]() / Bronze Trophy
/ Bronze Trophy ![]() ) - Acquire 3 Pack-a-Punch weapons at the same time.
) - Acquire 3 Pack-a-Punch weapons at the same time.
Perks in Spaaaaace (30 ![]() / Bronze Trophy
/ Bronze Trophy ![]() ) - Purchase every perk in one game.
) - Purchase every perk in one game.
Cryogenic Slumber Party (75 ![]() / Silver Trophy
/ Silver Trophy ![]() ) - Complete Richtofen's Grand Scheme.
) - Complete Richtofen's Grand Scheme.
Big Bang Theory (100 ![]() ) - Gain sweet, sweet, revenge.
) - Gain sweet, sweet, revenge.
Quotes
- Main article: Moon/Quotes
Radios and Audio Reels
- Main article: Moon/Radios and Audio Reels
Trivia
- There is no death song for the map; instead, only two laughs will be played. The second laugh is longer than the first and deeper in tone.
- If the player teleports while Earth is about to be hit by the rockets, the sky will turn red for a few seconds and will then show the view of space.
- The characters' player indicators are now randomized except for Dempsey, to ensure that Edward Richtofen is always in the game.
- Jumping in the trench outside the Receiving Bay in solo while having Quick Revive will teleport the player back to the surface when downed.
- Zombies in No-Man's Land will not drop Power-Ups.
- On the cage that surrounds the Pack-a-Punch Machine, there is a sign that reads "OBEY".
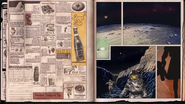
- In the loading screen, there is a shadow in the shape of a girl holding a teddy bear.
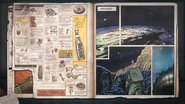
- There is also ads for a control panel like the ones on the Lunar Landers, a Monkey Bomb, Speed Cola, the Pack-a-Punch Machine, Thundergun, an idol like one seen in Shangri-La, the Vril Generator, the Vril Interface, an ad for a shrink ray, Mule Kick, a director's chair referencing George A. Romero from Call of the Dead, a Xenon belt, X-Ray glasses and a few other things.
- An alternative version of the Moon loading screen can be found in Treyarch's Zombies: A Brief History video.
- In Der Eisendrache, Griffin Station is subsequently destroyed by the younger original characters in order to tie up a few loose ends. This is rather ironic considering the original crew blows up the Earth from the Moon.
Gallery
Videos
References
| ||||||||||||||||||||


